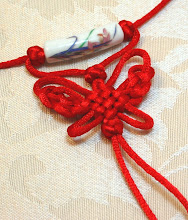
and so is my heart. Jackie, my best friend for the past 8 years moved away this morning! By away, I mean as far as one can, to the other side of this planet! I knew her plan for a while, but still kind of in shock when it's actually happening. We went to the same school, worked at the same place (not the same department), had our first babies around the same time, had lunches together all the time, countless playdates, and her boy was little caterpillar's first kiss! We still remember that was at Chinese New Year time, big ZZ was 10 month old, little caterpillar was only 5 month. He surprised us by pulling little caterpillar closer on both arms, and kissed and licked her face for more than 5 minutes! We couldn't stop laughing. It was the funniest and most innocent thing we ever seen. Yesterday, they kissed again! Nice loud kiss, right on the mouth! How cute!! Too bad, her little boyfriend is moving away, and they probably won't see each other for a very long time.
Jackie sold most of her stuffs on craigslist. But saved some stuffs she thought I might need, like a lovely toddler bed. Since little caterpillar is almost too tall for her crib, we have been thinking about moving her to a big girl bed. This is perfect timing. And it's white! Little caterpillar loves it too! I was disassembling it in their living room last night, she just climbed right in and sat in it. And when we got home, she jumped on the mattress right after I put it on our living room floor. She laid face down, kept saying she was going to bed, and even pretended to snore. I played this game with her before, but never thought she could remember it. She got more than that to remember about big ZZ. Jackie also gave me lots of big ZZ's books and toys, highchair, and even a pair of house shoes (brand new).
But last night was not all smooth. Before we took them to dinner, we move the toddler bed into the living room, so we will have more room to disassemble it later. Jackie's dad left the mattress right in the foyer. Guess when we closed the door, somehow the mattress got shaked and fell right there, blocking the front door. So, when we came back from the restaurant, we couldn't open the door. All the windows were locked, the back door was locked and chained! There we were 8 adults (us, Jackie's family, and two young people from craigslist there for pick up) and 3 babies, one is less than 3 month old, crying for milk. We were desperate. We didn't have any tools either, after some forcing, we realized bottom of the mattress (some strong framing material) is locked underneath the door, and the corner of it is jammed against the other door frame! I tried to use a branch to push the mattress to turn a little bit, but unseccessful. Only left a hole right on the side of it. Then Jackie remembered they have a small window shield scraper might be thin enough to get in there. Both of our husbands tried with no success. Then out of desperation, I tried again, and with some wiggling and twisting and lifting, miraculously I got the mattress to move and finally opened the front door! Whew! Cannot imagine what we have to do if we couldn't get the foor to open, all their stuffs are inside, and they supposed to leave for the airport early next morning. Thank goodness we did it! I joked that their trip will be nice and smooth because of this, all the bad luck happened before they even left the house.
They are on the plane right now, on their way to Beijing, their new home for the next few years. I really wish them all the luck, from the bottom of my heart. Thank you Jackie for your friendship for all these years! We are really going to miss you and your cute cute boys!
Monday, February 28, 2011
Friday, February 25, 2011
Tutorial - Reversable Bath Tissue Holder
I made this reversable bath tissue holder a while back, when I was trying to figure out how to use up my scraps. Apparently, people liked it and asked for a tutorial. I was so excited. But then everyone in the house got sick, so it has been postponed till now. This bag is quite simple, you can use it for anything, not just holding extra bath tissue. And you can change the dimension and make it in any size you desire. I am no expert at all, so here is just my way of making it. And since this is my first real tutorial, I probably said too much and might not explain everything clearly. So if you have any questions, just leave a comment.
Reversable Bath Tissue Holder: Materials
To make a bag like this, you need:
Reversable Bath Tissue Holder: Cutting
Reversable Bath Tissue Holder: Sewing
Just put in a couple of tissue rolls, and put it on top of the tank. And admire! Now the hard part, which side should I show off today?
There are lots of amazing tutorials out there, like this one from Pink Penguin, and the bagsket tutorial from foofanagle. Jessica from How About Orange once posted some awesome tutorials as well. Just google "fabric basket tutorial", you will find all of them.
Reversable Bath Tissue Holder: Materials
To make a bag like this, you need:
- Fabric for outside, inside, and border. The finished bag is quite small, so just some fabric scraps will be enough. I used home decor fabric samples I bought when Fabric Place closed shop, you can use thinner cotton. No need for interfacing, the tissue rolls will help the bag to hold its shape.
- Rottary cutter, ruler, and self-healing cutting board. If you don't have these, then you have to draw the design on the back of your fabric, and cut the pieces out with scissors. With the markings on the board and ruler, I didn't even need to draw the pattern.
- Sewing machine. Of course, if you don't have a sewing machine, you can hand stitch it. I personally love the cozy feeling of a hand-stitched item. But it's just too time consuming to me.
Reversable Bath Tissue Holder: Cutting
- Cut two 7" by 15" rectanglar pieces each from your outside and inside fabric.
- Cut two 5" by 15", and two 2.5" by 8" pieces (optional, for handles) from your border fabric.
You will end up with 8 pieces like the picture above.
Reversable Bath Tissue Holder: Sewing
- Put an outside rectanglar piece and a border piece right side together, and sew a straight line. Then open the finished piece, fold the seam towards one side, zigzag along the edge to add some decorative touch and provent it from fraying. Do the same with the inside fabric, attach it to the other side of the border piece. Repeat the step and sew the rest of the pieces together. You will end up with two bigger rectanglar pieces, with the outside and inside fabric on the either end, and the border piece right in the middle. Note: If your fabric has a direction like mine, make sure to sew the top of it to the border fabric.
- Put the two pieces right side together. Make sure you have the outside fabric facing each other, otherwise you will end up with a weird bag that the inside and outside are the same, front and back reversable. Pin all around and sew. Make sure to leave a small opening at the center of your inside fabric, so you can turn the right side out.
- Pick up one corner, use your fingers to feel the seams. Once you get the two seams right on top of each other, you have the perfect corner. Hold it on your cutting board or with a ruler, measure 2.5" down from the tip, you should get 5" across. Mark with marker or pin along the line, like the picture above. Sew along the line. Repeat this step to all four corners, then you end up with a rectanglar box shape. You should see the opening you left is on a shorter edge of the 'box'.
- Cut off the corners, leaving about 1/4" seam. You can zigzag all four seams to keep the corners from fraying.Turn the 'box' right side out through the opening, fold down the fabric and sew it shut.
- Now is the magic moment. Hold the center of the border fabric, and push the inside bag into the outside bag.And feel around, the seams where the border fabric meet outside and inside fabric should at the same level. Pin around the top of the bag, and sew a straight line or zigzag line if you want more details. Now if you turn your bag to change sides, it won't shift, and you don't have to realign it everytime. Basically, your reversable bath tissue holder is done.
- This step is optional. I like my bags to have handles, so I can easily move them around, say when I clean the bathroom. The two 2.5" by 8" pieces you cut are for handles. Press 1/4" seam along the long sides, then fold it in half. Fold in the two ends as well, about 1/4" in. Sew along the long edge. You can leave the two ends open for now. Repeat this to make the second handle. Pin the handles to the outside of your bag, and sew a square to secure it. Now you are finally done.
Just put in a couple of tissue rolls, and put it on top of the tank. And admire! Now the hard part, which side should I show off today?
There are lots of amazing tutorials out there, like this one from Pink Penguin, and the bagsket tutorial from foofanagle. Jessica from How About Orange once posted some awesome tutorials as well. Just google "fabric basket tutorial", you will find all of them.
Wednesday, February 23, 2011
Practice, Practice!
(Image Source, Purl Bee)
with my new favorite toys! I am so excited. Finally got my dream tools, a rotary cutter, self-healing cutting mat, and a non-skip ruler. Oh, I have been dreaming about this day for a long time, and this long wait definitely made this moment more sweet. They are kind of expensive, so I have been waiting for a big sale at Joann. And I got it! 40% off, then 10% off. So, total about $75 purchase, costed me only about $45! I need to clean up my sewing area in the basement, so I can give this baby a permanent home. For now, if I need to cut something, I have to bring all of them to the living room and do it on the floor. Anyway, I am still excited. I never used a rotary cutter before, so it's taking me a while to get used to it, and figure out how much pressure need to be applied. And I was worrying about damaging the ruler, so didn't put my cutter against the ruler, then I got all these wobbly cuts. Then I remembered a great tutorial I found a while ago, on Purl Bee. Oh, you will see more of my cutting tools in my future project shots, I promise. Hmm, what to cut next? Oh yeah, I promised someone a tutorial on how to make my reversable bath tissue holder. Some small pieces, different size and texture, great practice oppotunity. Oh, I am so excited.
Tuesday, February 22, 2011
TranquilityKnot Is Back Again
Ever since we had little caterpillar, all our attention went to her. Of course, she is our highest priority. Meeting her every needs and playing with her became our only activities when we are home. I do get about 1-2 hours 'free' time at night for crafting or sewing, after she went to bed. But those are mainly for my girl, or our friends' babies. Did I mention there are 3 boys about her age, and 3 new babies, oh, plus 4 5-year-olds, I have been quite busy with all kinds of gifts. Guess it's my own fault, I like to give away handmade gifts.
Anyway, only recently, I started listing some of my knots in my shop again, and was pleasantly surprised. People has been adding my shop and items to their favorites, and sold 6 items in less than a month. It's not very impressive for most Etsy sellers, but since I haven't spent any time or energy promoting them, this is quite exciting. And the last four were bought by a returning customer too. Hooray! I got returning customers! All I can say to these people who are supporting me is THANK YOU! I have lots of new designs in mind, they will some to my shop soon. You won't be disappointed!
Saturday, February 19, 2011
Portable Car Activity Mat Set
Finally, my secret project for the past couple of weeks. This supposed to be Christmas gift for my best friend's little boy, big ZZ, but I had a really hard time picking it out. They are moving overseas soon, I couldn't buy any toy too big, which will only make their move more difficult. Since we are best friends for years, I asked her directly, what kind of small toys or items she had in mind buying for her boy. She said nothing, which was not helping at all. Then we all got sick here in the house, one after another, lasted more than a month. Obviously, I was not in the creative mood. I did lots of searching online, finally got this great idea. Since big ZZ loves cars and trains, and he already got a train table, the best thing I can get him will be a car mat. Of course those big rugs are out of the question. I found some great inspirations in the blogworld. Yes, I am being honest here, I am not the first one thought of this.
Erin from Decor Allure made this amazing play mat with Michael Miller's "Merryville" fabric. She also listed other options, since this fun fabric was discontinues. I loved it so much, but after unsuccessful search online and on Etsy, I gave up this idea. But that drawstring bag is a brilliant idea.
Then I found this well designed tutorial at Fiscars Fun This Summer by Lisa. I love the idea making it with felt. I having making felt stuffs for a while, and still have a big piece of green felt left over from my Toddler Safe 2-D Christmas Tree project. But that size is just way to small for my plan. I wanted something much bigger, one that big ZZ can play with on the floor, or table. But I loved how she made the gas station and the car wash, and the fact this mat has car storage.
I also found this simple tutorial about how to make a matchbox car caddy with fabric.
So, this is what I came up with. A car mat made with felt, about 2ft by 3ft, has a school, a house with garage, a gas station with car wash, a small parking lot, bus and taxi stops, a pond with some trees, a roundabout, some one-way street, and pedestrain lines.Everything made of felt, lots of hand stitching, unexpectedly time consuming! I also found this wonderful fabric, lots of different cars, trucks, and airplanes, perfect for the backing of my mat. Then I made a matching car roll and drawstring bag with the same fabric. I even handstitched a little car and letter D (big ZZ's name) on the bag, even though I don't do embroidery at all. I just love the final result. More pictures can be found here on flickr. What I didn't expect was little caterpillar loves it too!? I have a plan for her play mat already, now it seems like I have to make another car mat for her. But she is a girl, and girls don't play with cars or trains. Well, if she likes it, I have no choice. I am too soft, want to do everything I can to make my girl happy. After I finished the whole project, I found this one from A Girl And A Glue Gun. Much more details than mine, but made with a hot glue gun. I probably will steal some of her ideas for my girl's version, but knowing my girl's tearing pulling abilities, I have to secure everything. Guess way lot handstitching is ahead of me.
Friday, February 18, 2011
Mesh Waste Bin Repurpose
Done by my favor 'designer', Little Caterpillar! It's her new favorite toy.
A way-too-big hat.
Or A basket or metal version of potato sack.
Wish we can all find joy in these small everyday things! Letting them be just kids is the best gift we can give them. I love her so much! She makes me laugh every minute, every day. My favorite girl in the whole wide world!
A way-too-big hat.
Or A basket or metal version of potato sack.
Wish we can all find joy in these small everyday things! Letting them be just kids is the best gift we can give them. I love her so much! She makes me laugh every minute, every day. My favorite girl in the whole wide world!
Thursday, February 17, 2011
How Was Your Valentine's Day?
Ours were pretty simple and sweet. Stubborn remembered to buy flowers for both me and little Caterpillar. Or should I say I got the flower because of her. Stubborn is not those romantic type at all, so we rarely celebrated Valentine's Day in the past. But the fact he remembered this year means so much to me. Little caterpillar absolutely loved it! She held on to her bouquet for a good half and hour before letting me put them in a vase. Typical girl! Even though her bouquet looks bigger than mine, I was very happy to see that he remembers my favorite flower. They are in this nice soft pink color, very sweet!
Oh, that taller vase I used for little caterpillar's bouquet is very special for us. You see, stubborn and I painted it together at our anniversary several years back. It's not the most beautiful vase in the world, but to us, it's some sweet memory.
Even though I was busy making the secret gift for my best friend's boy, I managed to squeeze in a little bit crafting for Valentine's Day. I made some paper heart garlands follow some instruction I found online a while ago. Could not find it again. So, whoever posted that instruction, THANK YOU!
Tuesday, February 15, 2011
Sick Again?
Poor little caterpillar started coughing yesterday. Not very bad, just a little bit. But she woke us up earlier this morning, around 2Am, very unhappy. She was having runny nose, and was breathing kind of harder. But at least, she was still very energetic, played 'with' mommy for an hour and half. Well, she looked much better this morning, but I just don't know how bad this can become and how long this will last. Actually this is the first time she ever had a cold! So obviously we don't really know how to help her feel better. Guess lots of reading to do tonight. Any one wants to share some tips?
Oh, I have been working on a secret project lately. It supposed to be Xmas gift for my best friend's son, but one thing after another, it just got postponed till now. I already finished the item itself, just need to quickly make a matching bag for it, so the little boy can carry it around with him easily. Stubborn asked me why I spend so much energy making this, instead of buying him something. Well, first of all, they are just not out there. And second, they are moving overseas in a couple of weeks, so I cannot buy something that's too big. I will show you some pictures after I am done with it. I am pretty sure he will love it, and enjoy it for years to come.
Monday, February 14, 2011
A Very Late Chinese New Year Post
Well, you might noticed that I kind of diappeared for a while. That's because all of us has been sick for about a month! Between taking care of a sick baby and even sicker hubby (more like a little kid then) while I was not totally recovered, and shovelling the crazy amount of snow once or twice a week, I was totally exhausted. Now that everything back to normal, and we finally have some sunshine outside to melt all that yard deep snow, I thought it might be time to catch up.
Little caterpillar looked so cute in this traditional top my best friend gave me last year. She got her first red envelope from her nanny. She was too curious to be polite, opened it immediately, when mommy was trying to take some pictures of daddy and her.
Even though most of us was still bothered by the infection in our mouth, couldn't really chew, I still made some dishes on Chinese New Year's Eve. Not as many as it supposes to be according to traditions, but we are a small family, don't have that many people to finish the food anyway. I made those backrib so tender, even Stubborn ate some, despite the pain (he lost more than 10 lbs in a week!). Little Caterpillar loved it too. But she prefer mommy's shrimps. We were happy to see her ate 3 shrimps and a piece of rib. Poor thing was in pain for days, refuse to bite or chew, only survived on milk. I was very glad she felt better and didn't miss the new year's eve dinner. Of course we made some dumplings from scratch, just forgot to take pictures.
My hometown has a list of food you should have during the 15 days of Chinese New Year. But I only can remember about 6, dumplings for New Year's Day, noodle for the second day, different kind of dumplings (giant dumplings flattened, more like a calzone) for the third day, Chinese style pancake (we made scallion pancake) and eggs for the forth day, dumplings again on the fifth day, but this time you have to chop the meat and vegetable. Then the next one I can remember is to have sticky riceball (with sesame seed paste or peanut or lotus seed paste, or whole bunch of other delicious fillings) on the 15th, the last day of the New Year. Other than these traditions, I remember my mom and grandma used to make the special steamed buns in these funny animal shape. So I made some hedgehog buns for little caterpillar, with sweet red bean paste stuffing. She absolutely loved it. Too bad I didn't have the camera around when she pinched off all the little spines.
Just to show you how much snow we got, here are some pictures of little caterpillar playing around the yard. Keep in mind little caterpillar is more than 34" tall, and the top layer of snow was very wet and heavy and compact.
Friday, February 11, 2011
Men Who Make me Go Weak at the Knees
Saw Benita's post today on her fabulous blog Chez Larsson, Men Who Make me Go Weak at the Knees. Thought it could be a great end of week post. Finally a week without shovelling, you gotta vent your energy somewhere else, right? Don't get mad, Benita, that I just stole your post title, it's just too cute!
Here is the list I wrote down. A girl can have more than one love, cannot we?
Sean Connery. DEFINITELY! Any age, my heart just skip a beat everytime I saw him (on screen of course).
Pierce Brosnan. Fell in love with him when I was a teenager, in Remington Steele. Cried so hard when heard the rumor that he died (so many many years ago). My knees went weak everytime I watched "The Thomas Crown Affair".
Toby Stephens, in Jane Eyre. I have seen many version of this wonderful novel, but love this one the most. My heart aches even just think of it now.
Mark Harmon, in NCIS.
Who is on your list?
Subscribe to:
Posts (Atom)